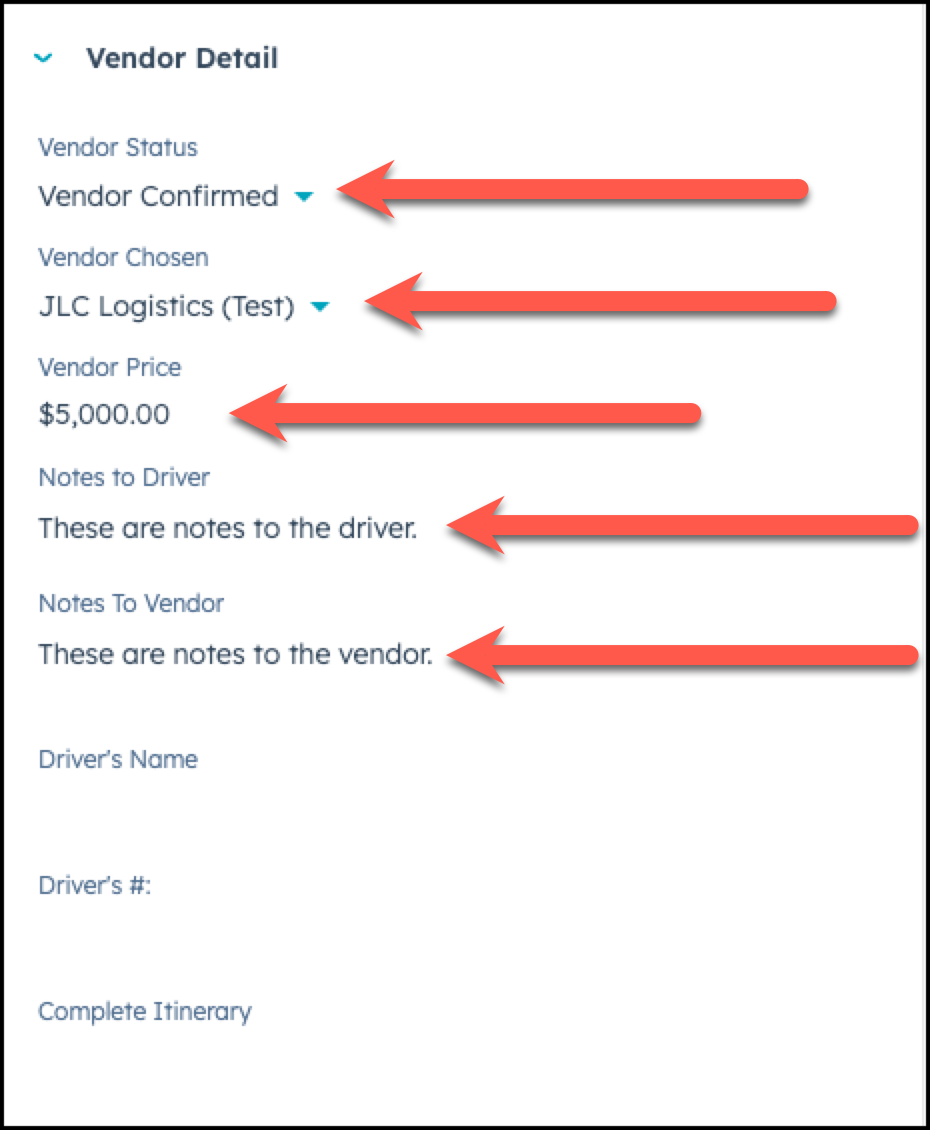
Step 1: Make sure the Vendor Detail Section is completed.
On the left side of the deal, scroll down to the Vendor Detail section in HubSpot and make sure that all fields are completed, inlcuding:
- Vendor Status
- Vendor Chosen
- Vendor Price
- Notes to Driver* If applicable
- Notes to Vendor* if applicable
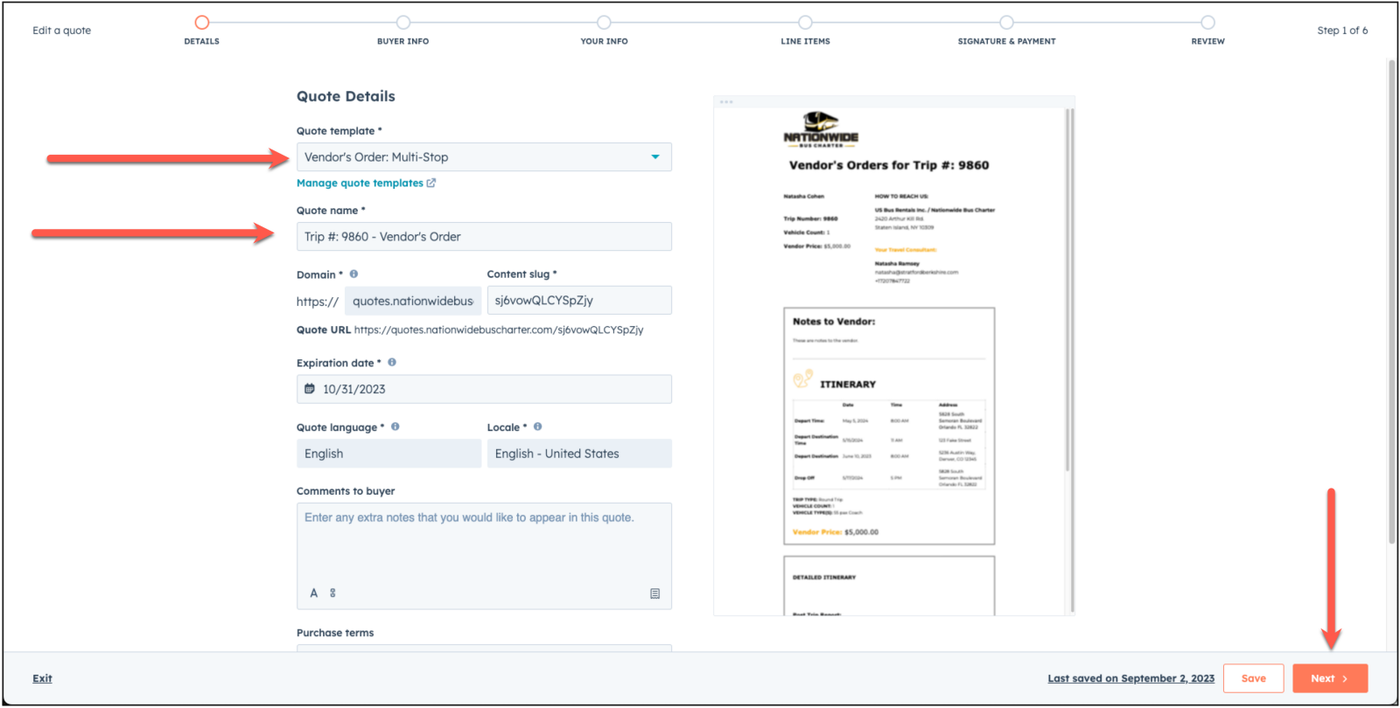
Step 2: Add a new quote
On the right side of the deal screen, +Add a new Quote.

Step 3: Choose the Vendor's Order Quote Template
Choose the Vendor's Order Quote template, and make sure that all areas of the quote are updated, including:
- Choose Vendors Order - One Way or Vendor's Order - Multi Stop depending on the trip type.
- Update the quote name to include - Vendor's Order so you can easily read that on the deal.
- Choose Next
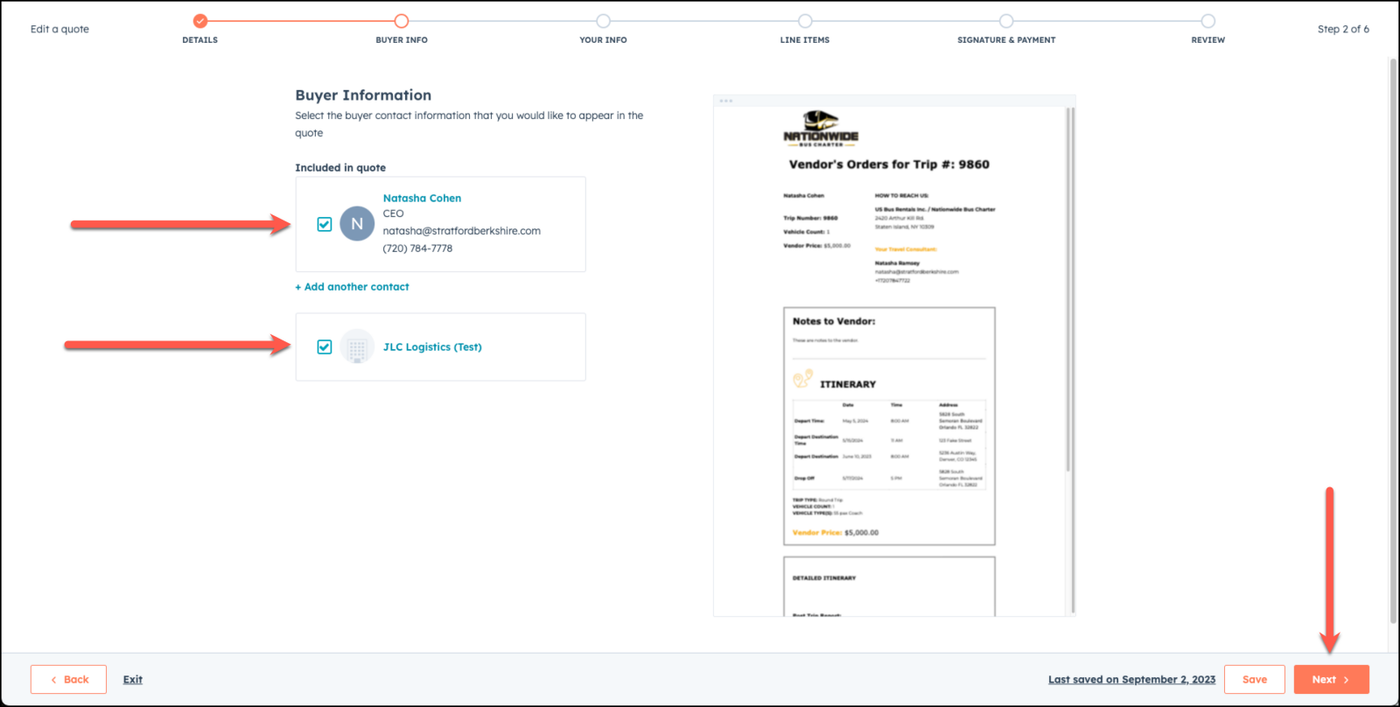
Step 4: Review the Contact & Vendor Information
Under the Buyer Info section, make sure that the customer's name, and the vendor are both chosen, so it apears in the Vendors Order.
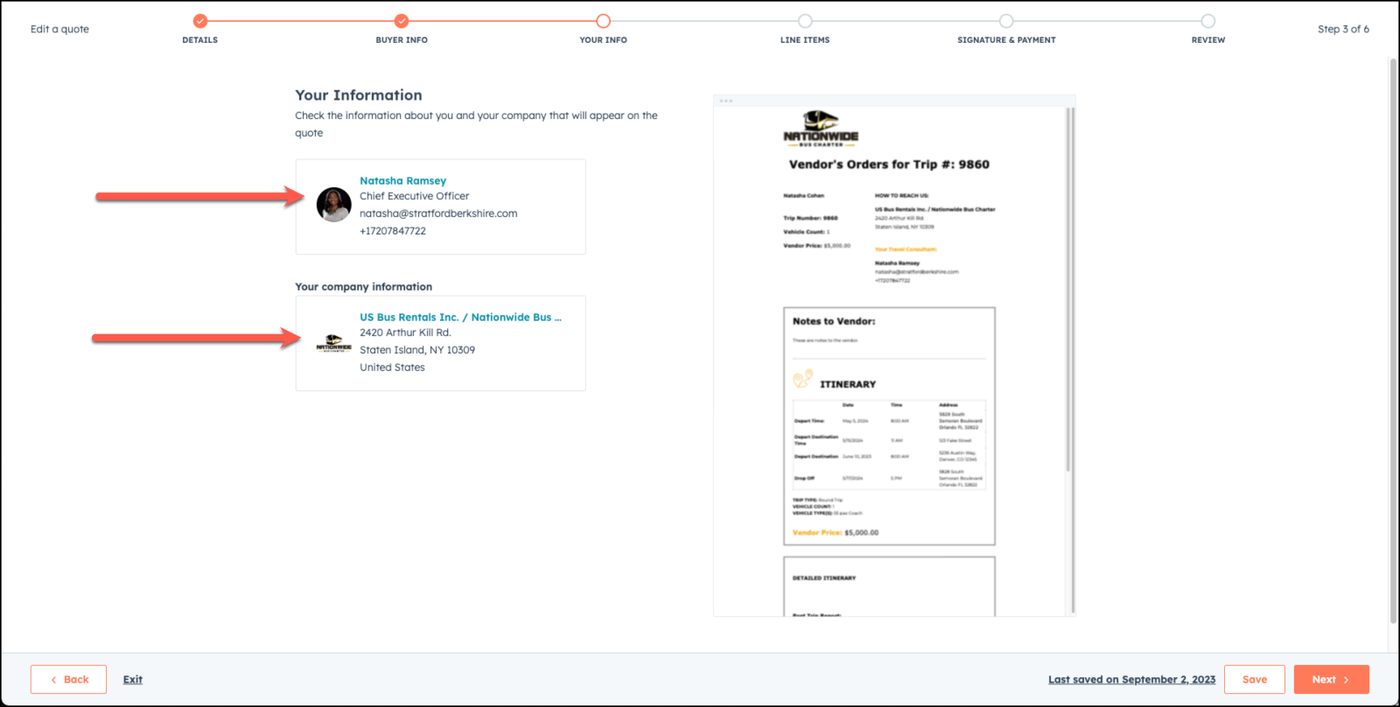
Step 5: Review your info
Under the Your Info section, make sure your details are correct.
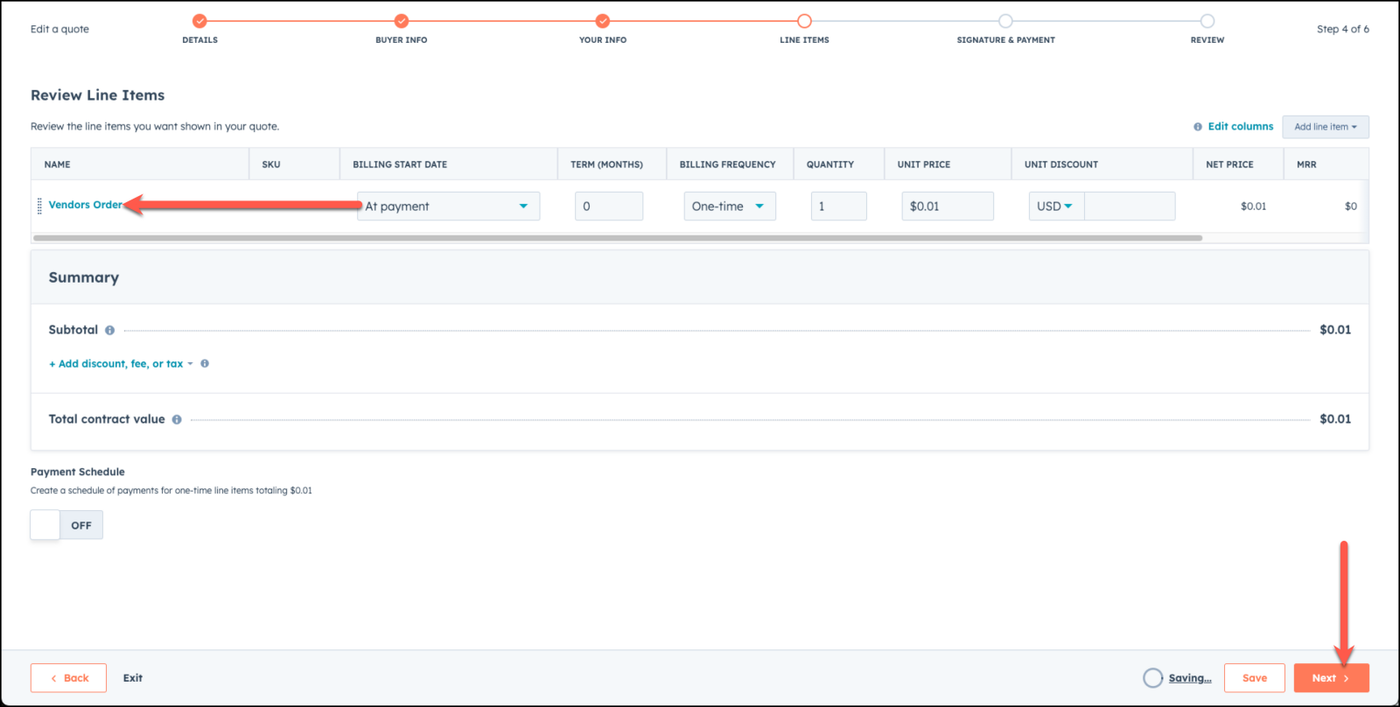
Step 6: Add Product Library - Vendors Order
Under the line items section, add the Vendors Order product line, and choose next.

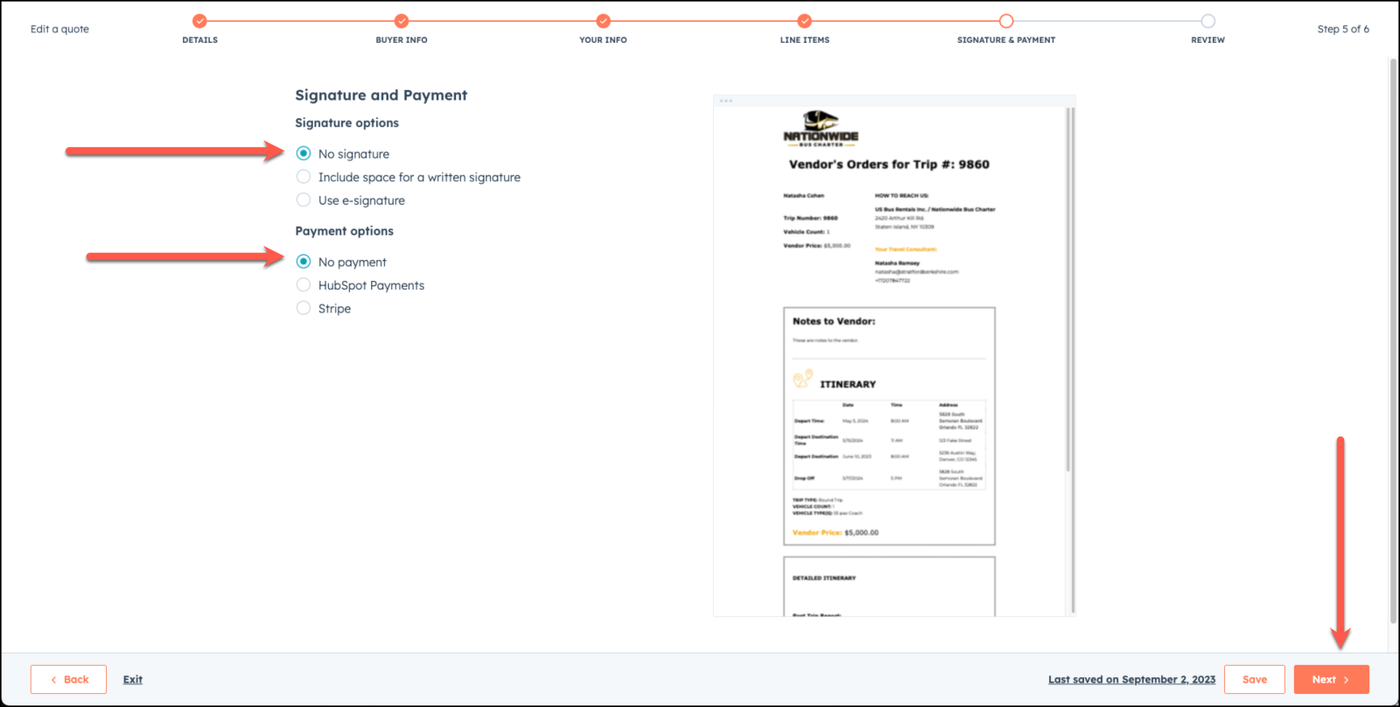
Step 7: Choose No Signature and No Payment
Under the siganture and payment section, choose no signature and no payment and choose next.
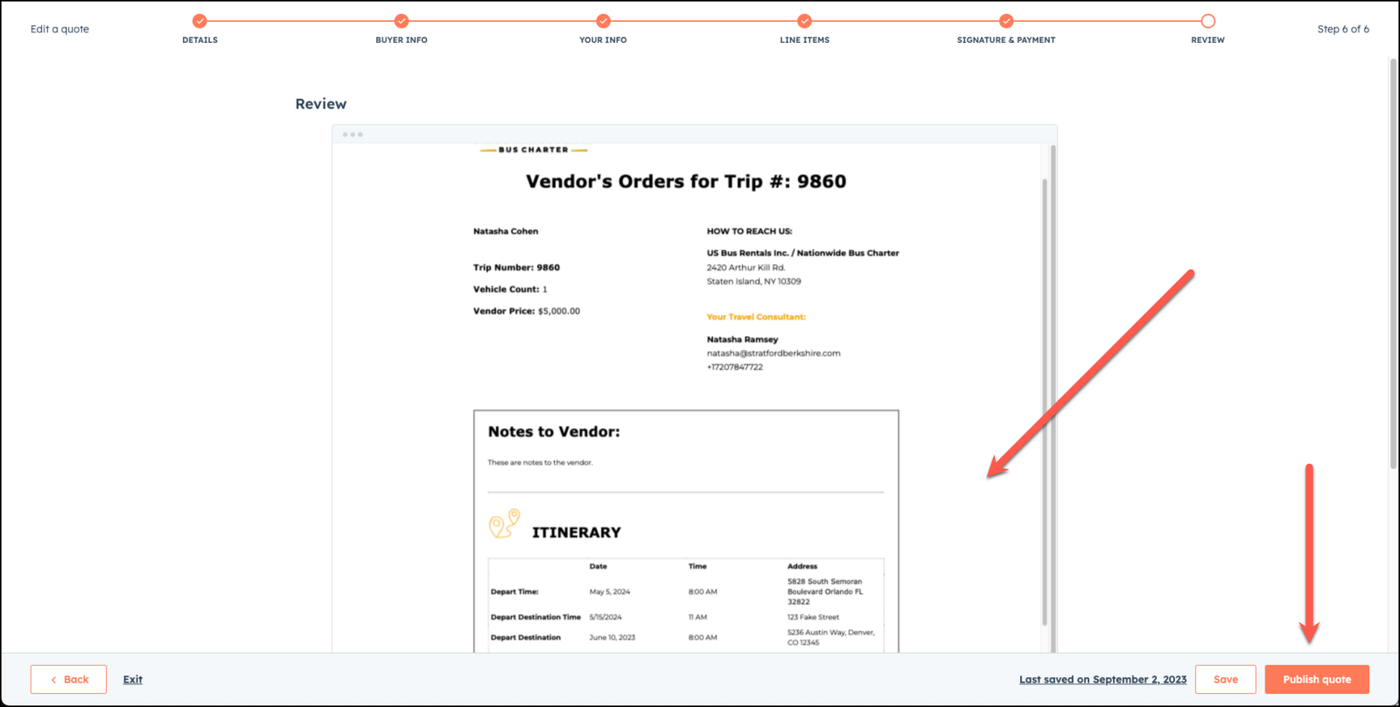
Step 8: Review the Vendors Order and Publish Quote
Review the Vendors Order in the preview screen and once it looks good to you, choose Publish Quote.
👍
Congratulations! You've successfully published the vendor's order! You may now email your vendor the vendor confirmation template.
Need Support?
Please visit our Support page and submit a ticket, view knowledge base articles, etc. Or send us an email at helpme@stratfordberkshire.com to open a new ticket.